30 Simple Scrap Wood Projects for Beginners: Unleash Your Creativity
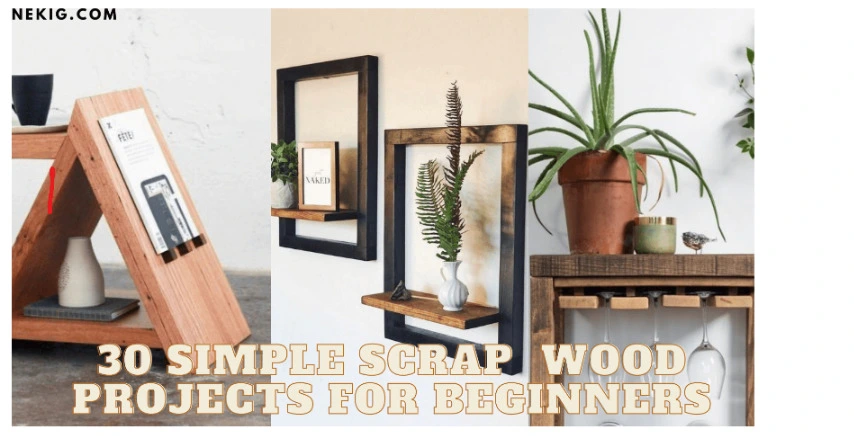
Working with scrap wood offers a fabulous chance for fledglings to investigate their imaginative side and set out on carpentry projects that are both satisfying and practical. Whether you’re hoping to tidy up your home style, make useful things, or just enjoy another leisure activity, these 30 basic piece wood undertakings will direct you through the excursion. From fundamental slices to gathering multifaceted plans, this article will walk you through each undertaking bit by bit, giving the subtleties you really want to succeed.
Which Home Upgrade Does Your Space Really Need?
Answer 5 quick questions to discover the ideas that will work best for your home.
wood working plan
1. Rustic Picture Frames:

Source :housefulofhandmade
Transform little piece pieces into enchanting photo placements. Figure out how to cut and gather the wood, and add a rural touch with color or paint.
Project: Rustic Picture Frames
Making provincial photo placements from scrap wood is an incredible method for adding a hint of appeal to your home stylistic layout while learning some essential carpentry strategies. This task will direct you through the most common way of making rural edges that can delightfully show your #1 photos or craftsmanship.
I utilized a table saw to score out a 1/4 depression on the back within the casing so the image sits inside it with a sponsorship, or you can place glass in it. It isn’t important to indent out the back so on the off chance that you don’t have a table saw you can skirt this step. Or on the other hand in the event that you have a switch, you can utilize it to score out the wood, yet I don’t have a switch
Materials Needed:
– Scrap wood pieces (various sizes)
– Saw (circular saw or miter saw)- Sandpaper (various grits)
– Wood glue
– Clamps
– Stain or paint
– Brushes
– Picture frame hangers or hooks
– Hanging hardware
– Protective gloves and eyewear
1.begin by scoring out the wood (assuming you need to). Set your table saw so the level of the sharp edge is 1/4 inch and the aide is 1/4 inch away from the cutting edge. Run the board through two times, when laying level and up as an afterthought so you make a wonderful minimal 1/4 inch indent.
2.For a 8 1/2 x 11 inch outline, measure 8 3/4 inch inside the score so the opening is around 8 1/4 inch. This leaves some leeway so the image will fit inside with a little room around it for focusing.
3.Utilized your beam square to draw a 45 degree point through the imprint.
4.After the 4 sheets are cut, 2 at 8 3/4 inch estimated within the score and 2 at 11 1/4 estimated within the indent, utilize your Kreg dance to place 2 openings in a single leading body of each edge of the 1×3 wide casing. For the 1 inch wide casing, utilize your nailer and put a 5.completing nail in each side of the corner from an external perspective of the edge.
6.Utilize a little wood stick in the joint and afterward cinch it down level so it doesn’t move when screwed.
7.Keep on utilizing paste and screws and secure each corner.
8.Utilize a dry brush with a tiny bit of piece of a smooth white paint. Whirl it around on an old yogurt top so there is a tiny bit of piece of dry paint on the finish of the brush.
9.Immediately brush this paint over the unpleasant, unsanded wood. In the event that you get any spots excessively weighty, sit back and relax, simply utilize an old cloth to take the it off before it dries.
For the 12 x 16 inch outline, I utilized dark paint and a similar dry brush procedure. It seems to be a charcoal stain.
Creating rustic picture frames from scrap wood is a rewarding woodworking project that combines functionality with artistic flair. With a few basic tools and some creativity, you can transform ordinary scrap wood into charming frames that showcase your cherished memories. Whether you choose to stain, paint, distress, or leave the wood in its natural state, your finished frames will add character and warmth to any room in your home.
2.Backyard Gardening:
The most effective method to Construct a Raised Bed Modest and Simple, Lawn Cultivating
4.Wooden Coasters:
READ ALSO :UNLOCK YOUR CRAFT: 32 IRRESISTIBLE WOODWORKING PROJECTS TO SELL AND THRIVE
Craft stylish coasters using wood slices or smaller leftover pieces. Sand, varnish, and you’ll have functional coasters in no time.
How to Make Wooden Napkins From a Log?
Assuming that you have a log that you might want to transform into wooden napkins, there are a couple of things that you should do. To begin with, you should cut the sign into slim cuts. The thickness of napkin the cuts will rely upon the size of your desired liners to make. When the log is cut, you should sand the cuts down so they are smooth. If you have any desire to add any sort of plan to the liners, you can do as such as of now. When the liners are sanded, you should apply a completion to them. This should be possible with an unmistakable sealer or a stain. When the completion is applied, you should allow the liners to dry.
How to Make Wooden Cup Napkin Without any preparation?
Making wooden cup napkins without any preparation is a tomfoolery and simple venture that anybody can do. With only a couple of provisions and some essential carpentry abilities, you can make your own liners in a matter of seconds.
To begin, you will require:
A piece of wood (we utilized 1/4″ thick compressed wood, however you can utilize any sort of wood you like)
A jigsaw
Sandpaper
A drill
A 1″ opening saw
Cup snares
In the first place, utilize the jigsaw to cut your piece of wood into the ideal shape.
We went with a straightforward round napkin, however you can get inventive and make any shape you like.
🎯 Discover Your Home Decor Style
source :woodenearth.com
5. Key Holder Shelf:
Plan a key holder utilizing scrap wood and snares. Learn essential cutting and gathering strategies while coordinating your keys.
6. Plant Stands:
Develop moderate plant stands to raise your indoor plants. Make a basic plan that supplements your home stylistic layout.
7. Wall-mounted Shelf:
Construct a drifting shelf for a special stockpiling arrangement. Find out about wall mounting and rack get together.
8. Wooden Telephone Stand:
Plan a custom telephone stand utilizing little pieces. Ideal for without hands seeing and charging.
9. Utensil Tray:
Create a wooden utensil plate for your kitchen. Integrate compartments for various things and analysis with wraps up.
10. Floating Wall Shelves:
Learn progressed mounting strategies to make smooth drifting racks. Ideal for exhibiting improvements or sorting out fundamentals.
Scrap Wood Wall Art:
Express your imagination by collecting different wood pieces into an eye-getting wall workmanship plan. Paint or stain each part of upgrade the visual allure.
10. Wooden Bookends:
Make custom bookends by forming and sanding scrap wood pieces. These can add character to your shelf.
11. Simple Capacity Box:
Fabricate a little stockpiling box utilizing essential joinery methods. Tweak the plan with handles or a top.
12. Tablet Holder:
Make a tablet holder for happy with perusing and streaming. Explore different avenues regarding points and sizes to view as the ideal fit.
13. Hanging Adornments Organizer:
Plan an exquisite adornments coordinator utilizing scrap wood and snares. Add a dash of refinement to your space.
14. Serving Tray:
Develop a serving plate with handles for conveying tidbits and beverages. Get done with a defensive coat for sturdiness.
15. Wooden Plant Markers:
Make plant markers for your nursery utilizing little wooden pieces. Paint or etch the names of various plants for simple distinguishing proof.
16. Wall Mirror Frame:
Fabricate an edge for a plain mirror to upgrade its appearance. Explore different avenues regarding various plans and wraps up.
17. Wooden Candle Holders:
Shape scrap wood into extraordinary candle holders. Explore different avenues regarding levels and shapes to make an intriguing focal point.
18. Pet Taking care of Station:
Create a trendy taking care of station for your pet. Integrate bowls and capacity for food and frill.
19. Desk Organizer:
Plan a work area coordinator to keep your work area clean. Incorporate compartments for pens, paper, and different basics.
20. Outdoor Birdhouse:
Fabricate a perching space utilizing scrap wood, giving sanctuary to padded companions. Find out about penetrating and gathering.
21. Rustic Wooden Sign:
Make a provincial sign with an inspirational statement or your family name. Explore different avenues regarding various textual styles and troubling methods.
22. Wooden Coat Rack:
Make a coat rack with snares for hanging coats, caps, and sacks. Pick a plan that matches your doorway.
23. Napkin Rings:
Shape little wood pieces into napkin rings for extraordinary events. Beautify with paint, stain, or embellishments.
24. Bookshelf Ends:
Plan shelf closes that hold books set up and add character to your racks. Explore different avenues regarding shapes and tones.
25. Wooden Pen Holder:
Create a wooden holder for your pens and pencils. Try different things with various sizes and compartments.
26. Recipe Book Stand:
Construct a represent holding your recipe books or tablets while cooking. Integrate a sprinkle gatekeeper to safeguard against spills.
27. Scrap Wood Clock:
Develop a remarkable clock utilizing wood pieces as hour markers. Introduce clock components for a useful watch.
28. Mini Planters:
Make little grower for succulents or spices. Explore different avenues regarding various shapes and plans.
29. Floating Wine Holder:
Create a drifting wine holder to grandstand your wine assortment. Find out about equilibrium and weight dispersion.
30. Wooden Nameplate:
Plan a customized wooden nameplate for your home’s entry. Explore different avenues regarding cutting, etching, or painting.
Conclusion:
With these 30 simple scrap wood projects, beginners can dive into the world of woodworking with confidence. Each project offers a chance to learn new skills, experiment with designs, and create something both practical and aesthetically pleasing. From functional household items to decorative pieces, the possibilities are endless when you have a bit of scrap wood and a lot of creativity. So, gather your tools, unleash your imagination, and start crafting your way to woodworking success.