
You don’t need a sprawling studio to make beautiful things. Promise. I turned a glorified closet into a vintage-inspired craft haven that actually functions—and looks cute on Zoom. Here’s how I squeezed charm, storage, and sanity into one tiny room without crying over lost floor space.
1. Start With A Micro Floor Plan (Yes, With Tape)

Before you buy a single basket, map the room. I literally taped out my desk, cart, chair swing space, and where the door swings. It’s not glamorous, but neither is returning the wrong-sized table twice. Ask me how I know.
Why it works:
- Scale beats style in a small room. A petite desk plus a slim rolling cart > one giant farmhouse table that blocks the door.
- Zones reduce chaos: one wall for making, one corner for storing, one sliver for photographing finished projects.
Quick Tips:
- Use painter’s tape to outline your furniture footprint.
- Leave a 30–36″ path so you’re not crab-walking around stuff.
- Measure vertical clearance for shelves—ceiling height is your new best friend.
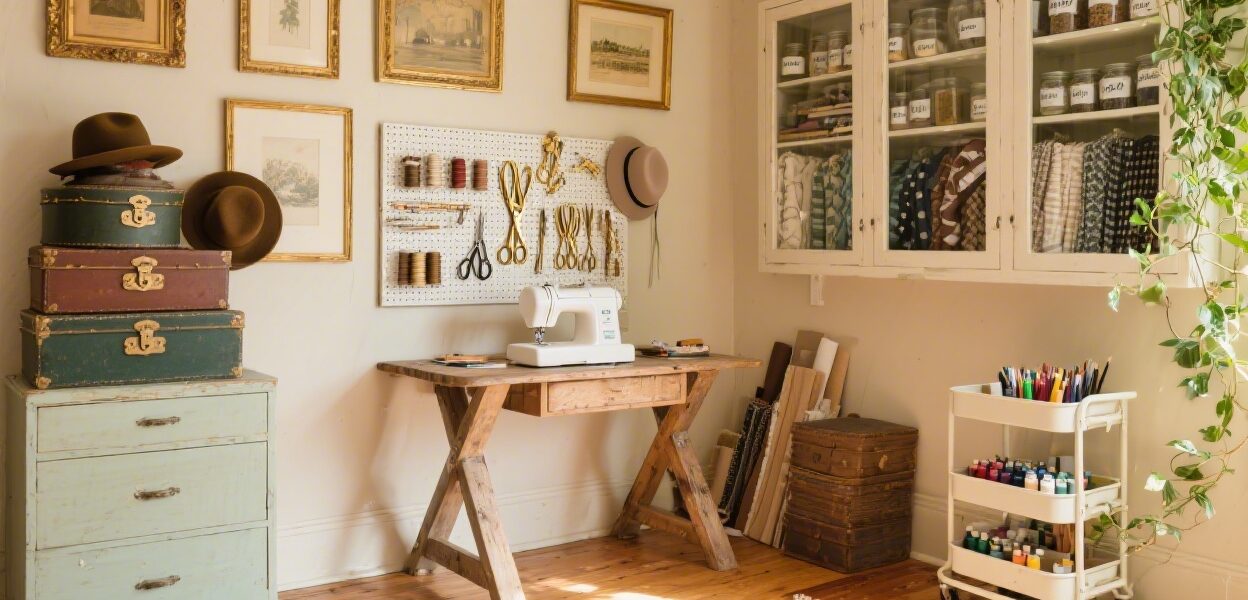
2. Choose Vintage Pieces With Job Titles
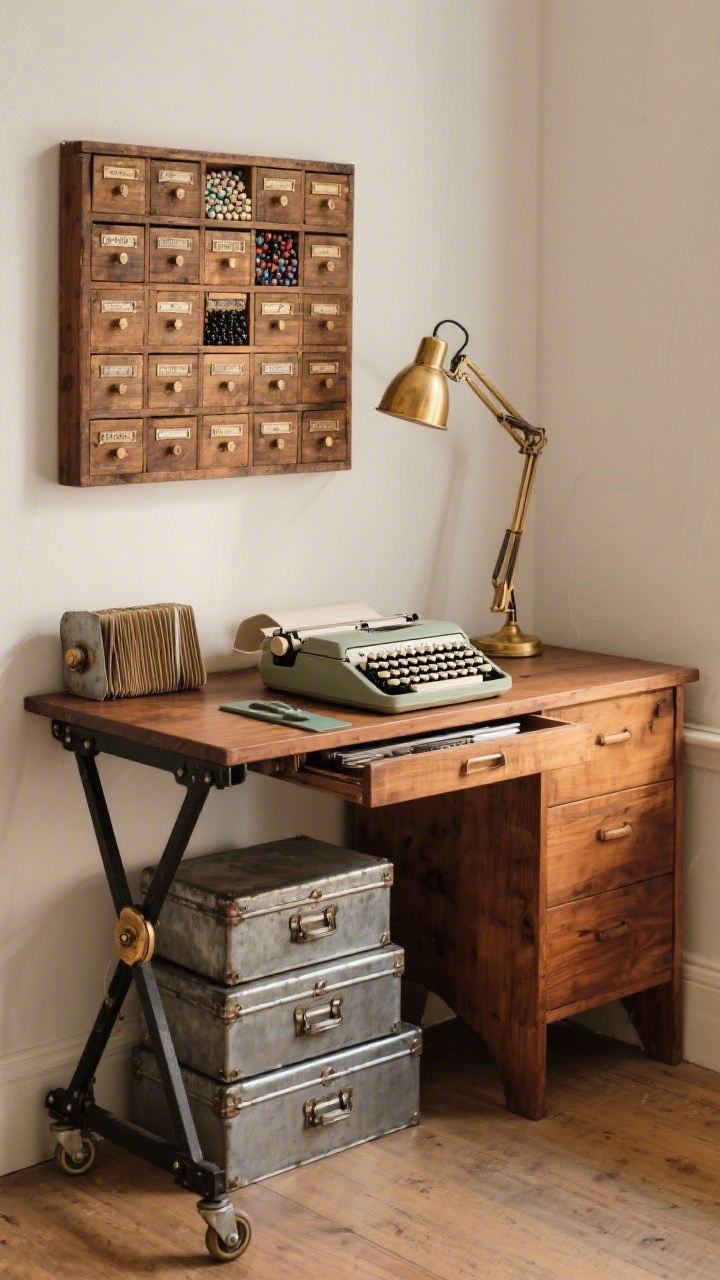
Vintage is gorgeous, but it needs to earn its keep. I picked pieces that pull double duty, like an antique typewriter table as a pull-out cutting station and an old postal sorter for paper and ribbon. Cute is great; cute + functional is chef’s kiss.
Which Home Upgrade Does Your Space Really Need?
Answer 5 quick questions to discover the ideas that will work best for your home.
What to hunt for:
- Postal sorters/card catalogs: tiny drawers for beads, ink pads, and thread.
- Folding typewriter tables: narrow profile, locking wheels, strong top for machines.
- Vintage toolboxes: metal, stackable, indestructible, and they look legit.
- Accordion wall lamps: pull light exactly where you need it, retract when you don’t.
FYI: Mix woods and metals, but keep finishes consistent-ish. My brass, black iron, and warm oak play nice because I repeat each at least twice.
3. Go Vertical: Shelves, Pegs, And A Ceiling Hook (Trust Me)
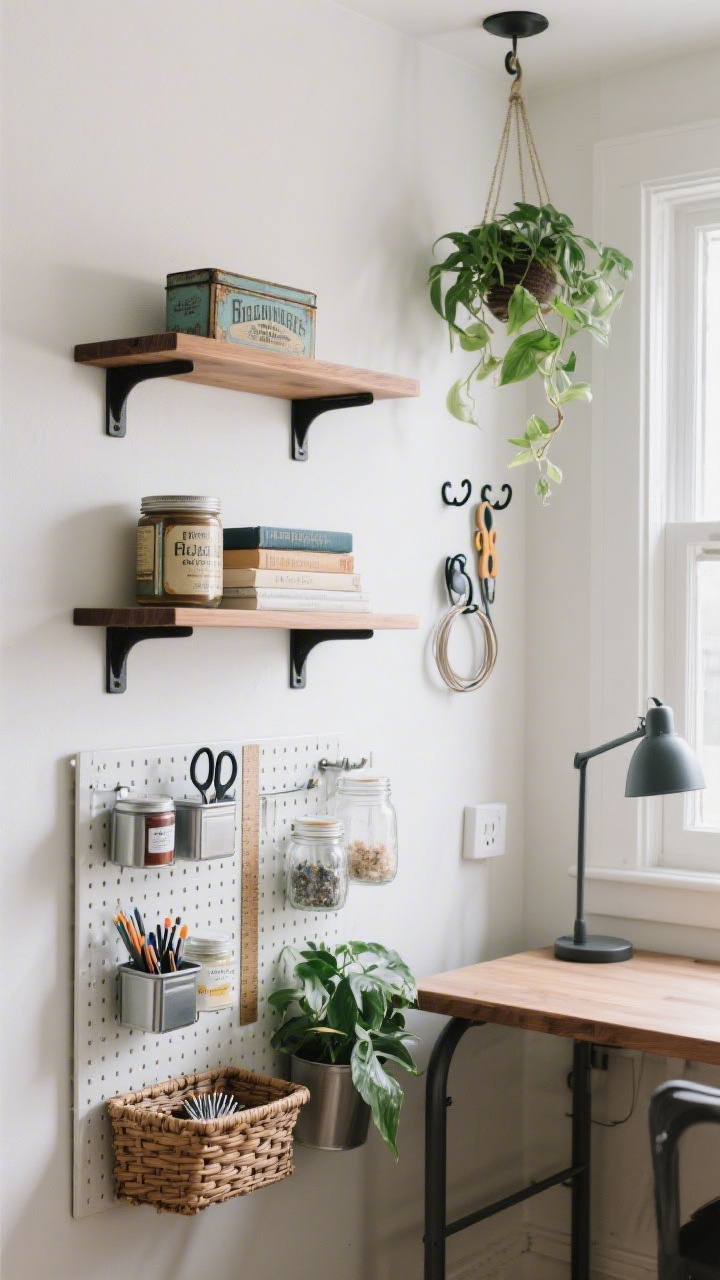
The floor is full. The walls? Wide open. I installed two shallow shelves above the desk, a pegboard over the cart, and a ceiling hook for a hanging plant that hides a not-cute outlet. It’s like a gallery wall, but everything has a purpose.
Smart vertical moves:
- Shallow shelves (8–10″): perfect for jars, paints, and mini bins without head-bumping.
- Pegboard with baskets: tools at eye level = fewer “where’s my scissors” meltdowns.
- Magnetic strip: holds snips, metal rulers, and tiny tins of pins like a boss.
- Ceiling hook + S-hooks: hang wire cutters, hoops, and tapes—air space counts!
Pro move: Keep the top shelf styled (books, vintage tins), bottom shelf purely functional. That way it still looks intentional on messy days.
4. Create A Flexible Work Surface That Expands (And Disappears)

I wanted room to spread out without committing to banquet-table energy. Enter a small desk with a drop-leaf side and a folding wall-mounted table that flips down when I need extra cutting space. When I’m done, everything shrinks back. Magic.
My setup:
- Core desk: 36″ wide with drawers for daily tools.
- Drop-leaf side: pops up for messy projects; supported by a swing leg.
- Wall table: mounted at standing height for cutting; folds flat to 3″.
Bonus: A self-healing mat lives on the wall table so cutting is grab-and-go. And I put felt pads under everything so I can nudge furniture without waking the neighbors.
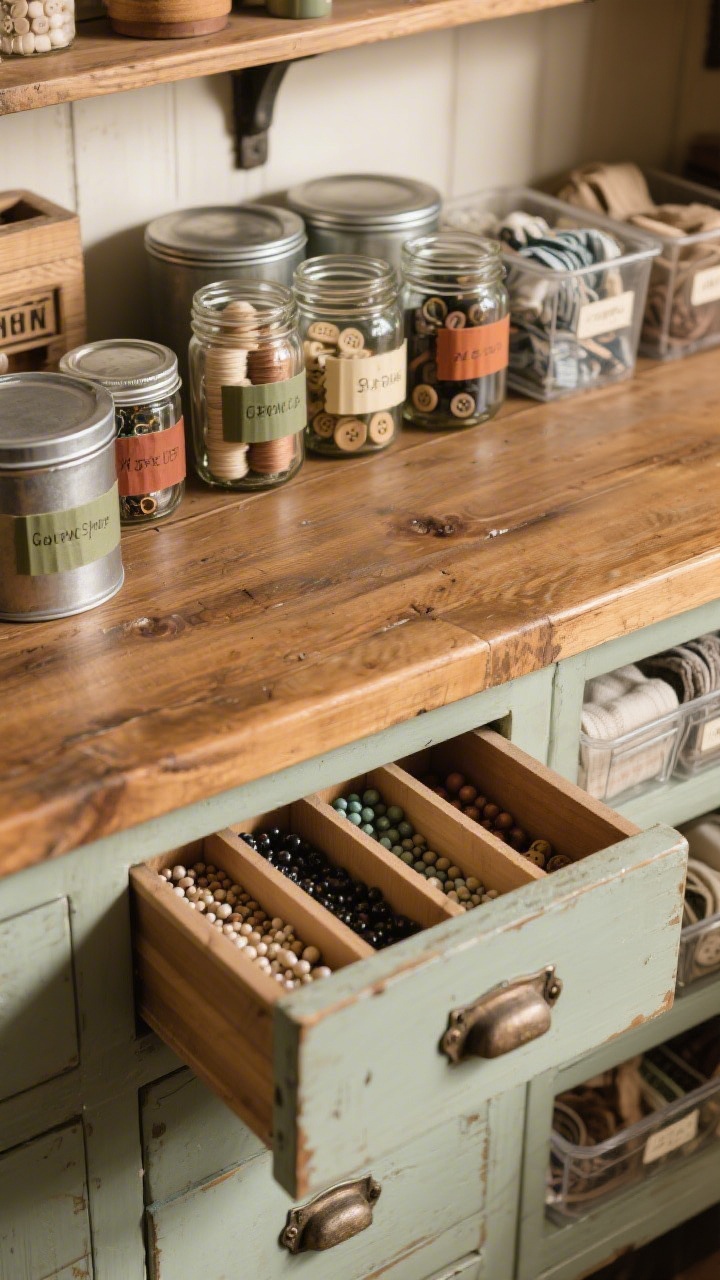
5. Organize Like A Vintage General Store (Labels Or Bust)
🎯 Discover Your Home Decor Style
Function comes from knowing where everything lives. I went full shopkeeper: glass jars for threads and buttons, labelled tins for weird bits, and clear bins for fabric. The vibe is old-school mercantile meets “I can find my glue gun in 3 seconds.”
Systems that stick:
- Decant by task: keep everything for one project type together (e.g., “Stamping,” “Needlework”).
- Label front and top: so you can read it whether the bin is on a shelf or stacked.
- Use odd numbers on display: groups of 3 or 5 jars look curated, not cluttered.
- Color-code lightly: washi tape tabs in muted tones (olive, rust, cream) so it still feels vintage.
IMO, drawer dividers are the unsung heroes. I cut thin balsa wood to size, slotted it into an antique drawer, and now beads don’t jailbreak every time I open it.
6. Light It Like A Tiny Photo Studio (But Keep It Moody)
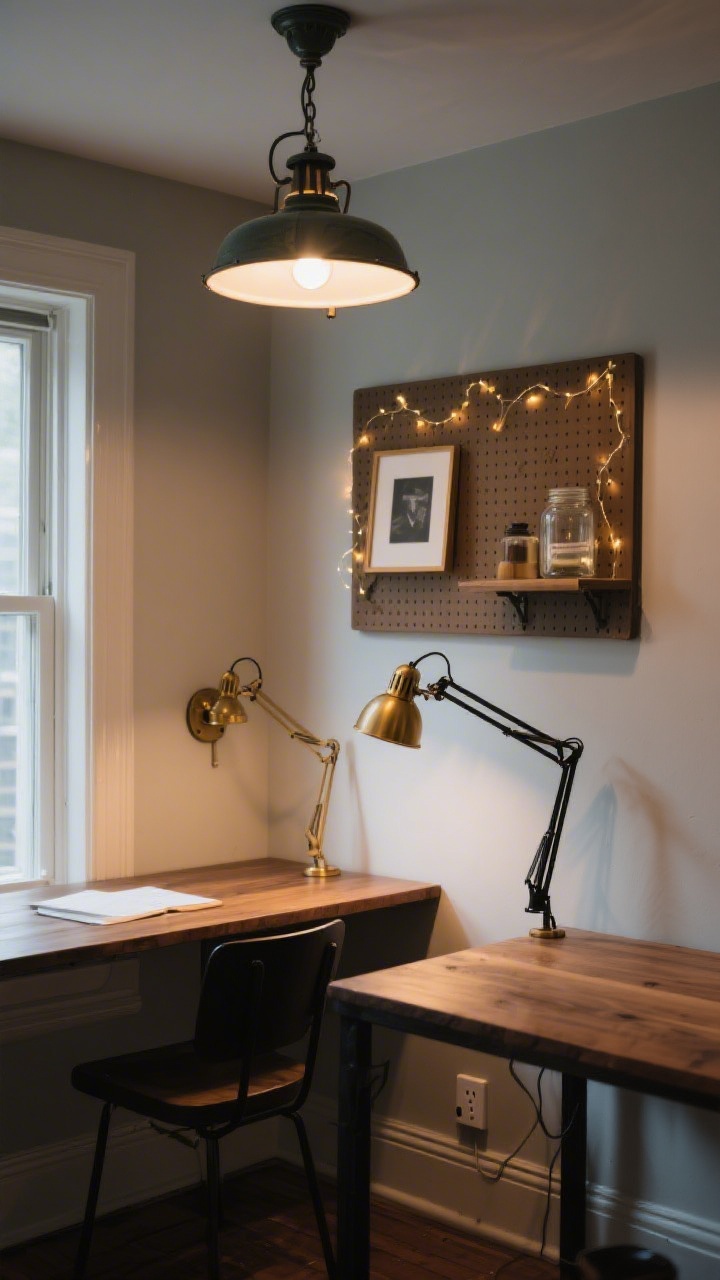
Crafting in cave lighting is a fast track to eye strain and questionable color choices. I layered three types of light so the room plays nicely day and night. It’s practical and surprisingly atmospheric—think moody library that also does precision cutting.
The trifecta:
- Ambient: a vintage-style schoolhouse ceiling light with warm LED bulbs.
- Task: swing-arm sconce and a clamp lamp you can move to the wall table.
- Accent: a tiny picture light above the pegboard and a strand of micro fairy lights in an apothecary jar. Do I need them? No. Do they spark joy? Absolutely.
Choose 4000K LEDs for task work (true color) and keep accent lights at 2700K for cozy. Add a smart plug so you can hit one button and the whole room wakes up like, “Let’s craft.”
7. Style The Vintage Story—But Keep It Moving
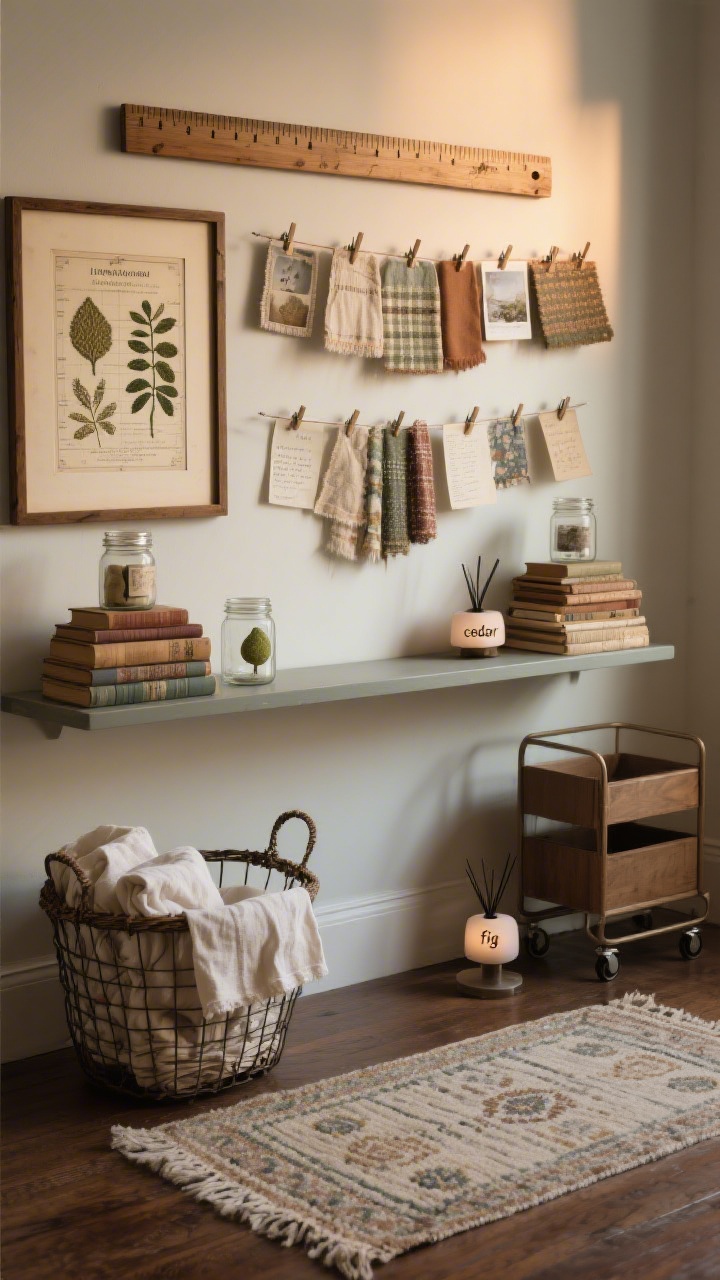
This is where it stops being storage and starts being a mood. I leaned into the vintage craft studio vibe with framed embroidery samples, a wooden yardstick gallery, and an old botanical chart. It looks collected, not themed, because almost everything earns its keep.
Decor that does work:
- Clip rails: hang current swatches, inspiration photos, and notes so your wall evolves with projects.
- Books as risers: stack vintage craft books to level up jars and add height variation.
- Pretty rags are a thing: stash flour-sack towels in a wire basket—they’re gorgeous and practical.
- Rug math: a flatweave 3×5 grounds the space without tripping your rolling cart. Pattern hides spills, thank me later.
Final flourish: a signature scent (cedar or fig) in a small diffuser. It’s subtle, it’s soothing, and it makes your tiny studio feel intentional. Also, scents are the fastest way to tell your brain “studio time.”
Mini Maintenance Routine (So It Stays Cute)
- Five-minute reset: sweep everything loose into a “reset bin,” then put it away once a week.
- Outbox rule: one small bin for supplies to donate or trade. When it’s full, it goes.
- Project cap: no more than three active trays at once. Chaos hates boundaries; give it some.
And yes, I do keep a tiny handheld vacuum on the wall because paper confetti is sneaky. FYI: the vintage look doesn’t have to mean high-maintenance cleaning.
Shopping Shortlist (If You’re Starting Today)
- Drop-leaf desk or wall-mounted folding table
- Pegboard with baskets and hooks
- Three glass jar sizes + metal tins
- Vintage sorter or toolbox (thrift, estate sales, FB Marketplace)
- Swing-arm task lamp + clamp lamp
- Self-healing mat and magnetic strip
- Label maker or kraft tags with twine for that old-shop vibe
End result? A tiny, hard-working nook that feels like stepping into a pocket-sized atelier. It functions because everything has a job, and it charms because every piece tells a story. Small space, big creativity—now go make something gorgeous.
Some content on this website is created with AI assistance and carefully reviewed and edited by the Nekig team to ensure quality and accuracy.
💬 Join Our Small Space Living & Decor Community
Get daily apartment decor ideas, smart storage hacks, and budget-friendly inspiration from thousands of small space lovers.
👉 Join the Facebook Group
[…] How I Turned a Tiny Room Into a Vintage Craft Space That Actually Works […]